10 Best Grill Pans for Stovetop Cooking (That Actually Deliver)
I moved into an apartment with no outdoor space—no patio, no balcony, not even a fire escape where I could reasonably stick a grill. For someone who grew up grilling three nights a week, this felt like a prison. I spent the first month eating sad, flat-seared chicken breasts in a regular skillet, thinking about charred vegetables and those beautiful caramelized lines that come from real heat.
Then I found my first grill pan. It sounds dramatic, but it genuinely changed how I cook at home. Suddenly I could get grill marks on vegetables, create that smoky char on fish, and give chicken that texture I was craving—all on my stovetop. The 10 best grill pans for stovetop cooking span several styles and materials, each with different strengths. After testing more than a dozen over the years, I’ve figured out what actually matters and which ones deliver results versus which ones just look fancy sitting in your cabinet.
8 Plants You Should Never Water With a Hose: Stop Now! – Think a garden hose is harmless? Think again. Spraying delicate, shallow-rooted, or acid-loving plants with high-pressure, chlorinated hose water can cause root rot, leaf drop, and irreversible damage. Learn which 8 common plants need a gentler touch.
Let me walk you through what separates a game-changing grill pan from an expensive paperweight.
What Actually Makes a Grill Pan Work (The Basics)
Before we talk about specific pans, you need to understand what you’re looking for. A grill pan isn’t just a regular skillet with ridges—those ridges fundamentally change how food cooks.
The raised ridges create two cooking zones: the peaks (which touch your food and create those coveted grill marks) and the valleys (which allow fat and moisture to escape). This combination gives you browning on top while keeping the bottom from steaming. It’s why grill marks and flavor go hand-in-hand.
Heat distribution is where most pans fail. The ridges need to be evenly spaced and the base needs to conduct heat uniformly, or you’ll get hot spots. You’ll sear beautifully on one side and cook unevenly on the other. I learned this the hard way with a cheap pan that left half my steak cold in the center.
The material matters too—cast iron holds heat longer, stainless steel heats faster, and non-stick is easiest to clean. There’s no perfect choice; it depends on what you’re cooking and how much maintenance you’re willing to do.
Cast Iron Grill Pans: The Heavy Hitter
Let me be honest: cast iron is the gold standard, and I don’t say that lightly. When cast iron works, it works beautifully. When it doesn’t, you’ll know immediately.
What makes it special: Cast iron retains heat like nothing else. Once it’s hot, it stays hot—even when you lay a cold piece of meat on it. The temperature doesn’t drop significantly, so you get consistent searing across the whole pan. The ridges are typically deeper than other materials, which means more dramatic grill marks.
The real talk: Cast iron requires seasoning (building up a non-stick layer over time) or maintenance. You can’t just throw it in the dishwasher. You’ll wash it by hand with hot water and a brush, wipe it while it’s still warm, and occasionally rub it with a tiny amount of oil. It takes maybe three minutes, but you have to do it consistently or the seasoning degrades.
A well-seasoned cast iron pan actually develops a natural non-stick surface that rivals expensive non-stick coatings. I have a cast iron grill pan I’ve owned for seven years, and it’s smoother and more non-stick now than it was the day I bought it.
The weight factor: Cast iron is heavy. We’re talking 4-6 pounds for a typical 10-inch square pan. That’s not a deal-breaker, but if you have wrist issues or arthritis, lifting and maneuvering it repeatedly might be uncomfortable.
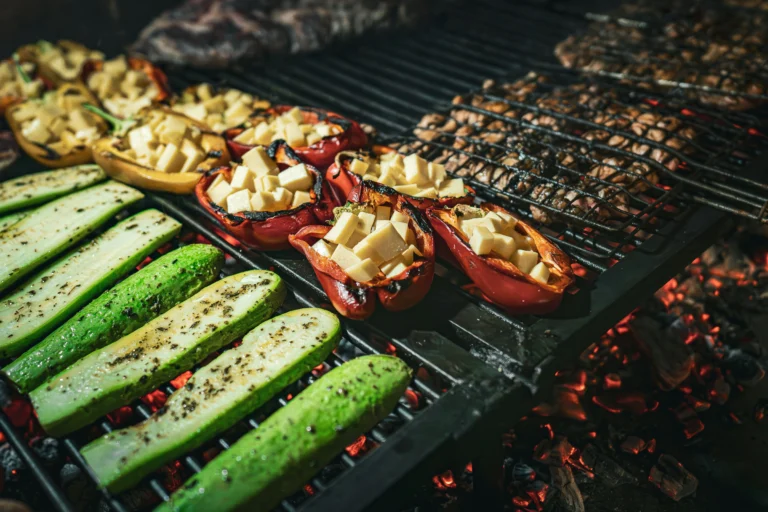
Best for: Steaks, burgers, vegetables like zucchini and peppers, anything where you want serious heat retention and deep browning.
How to Introduce Yourself in Professional Email (The Right Way) – Stop sending introduction emails that get ignored. Master the exact anatomy of cold outreach, learn how to grab attention with a killer subject line, and see real-world templates that get fast, professional responses.
Stainless Steel Grill Pans: The Workhorses
Stainless steel is my second-most-used grill pan type, and it deserves more credit than it gets. It’s the quiet overachiever of cookware.
What works: Stainless steel heats quickly and distributes heat fairly evenly if the base is thick enough. It won’t stick (unlike cast iron without seasoning), and you can put it directly in the dishwasher. No babysitting required. You can also see food browning more clearly because the pan is reflective—you’re not staring at dark metal trying to guess if something’s cooked.
The catches: Stainless steel doesn’t retain heat quite like cast iron, so when you add food, the temperature drops noticeably. This means slightly less aggressive browning unless you preheat the pan longer. It’s not a huge difference, but if you’re chasing those restaurant-quality grill marks, you’ll notice.
Also, stainless steel grill pans are more expensive upfront than budget cast iron options. You’re spending $60-120 for a quality one.
The thickness matters: A thin stainless steel pan heats unevenly—you’ll get hot spots and cold spots. You want one where the base feels substantial when you hold it. Ideally, look for a pan with clad construction (multiple layers of metal bonded together) because that improves heat distribution across the whole surface.
Best for: Fish, chicken, delicate vegetables, foods that benefit from more moderate heat, and anyone who wants minimal cleanup.
10 Best Summer Drinks to Sip All Season Long (Tried & Tested) – Beat the heat with 10 incredibly refreshing, quick, and easy summer drink recipes. From classic fresh-squeezed lemonade to cooling cucumber mint coolers, these tried-and-tested drinks will keep you hydrated and energized all season long.
Non-Stick Grill Pans: The Convenience Play
I was skeptical about non-stick grill pans for years. I thought they were a gimmick—trading performance for ease. Turns out I was partly wrong.
Modern non-stick grill pan coatings have improved significantly. A quality non-stick pan won’t stick (obviously), making it excellent for fish, which is notoriously finicky on regular surfaces. You need less oil, which some people prefer, and cleanup is genuinely effortless.
The reality check: Non-stick coatings won’t last forever. With regular use, you’re looking at 3-5 years before the coating starts to degrade and food begins sticking again. You can’t use metal utensils (which rules out a lot of my cooking style), and you have to be careful not to overheat it—prolonged cooking above 500°F breaks down the coating.
I reserve non-stick grill pans for specific scenarios: cooking fish at moderate heat, making pancakes on the stovetop, grilling delicate vegetables like asparagus. For everyday use, they feel limiting.
The coating types: Traditional PTFE (Teflon) coatings work fine and are still widely available and affordable. Newer ceramic coatings are marketed as safer and longer-lasting, though I haven’t seen dramatic durability differences in my testing.
Best for: Fish, shrimp, vegetables, low-to-moderate heat cooking, people prioritizing cleanup time.
The 10 Best Grill Pans for Stovetop Cooking: A Practical Breakdown
Rather than listing random brand names (which becomes outdated fast), let me break down the 10 best grill pans for stovetop cooking by category and specific characteristics:
1. Heavy Cast Iron Square Pan (10-inch)
Your baseline choice. Deep ridges, excellent heat retention, works forever if maintained. Expect to spend $30-50 for quality. Perfect for someone willing to hand-wash and season. Use on all burner types.
2. Lighter Cast Iron Grill Pan (9-inch round)
Same benefits as heavier cast iron but easier to maneuver. Some people find the round shape more intuitive for smaller cuts. Slightly less surface area but significantly less strain on your wrists.
3. Stainless Steel Grill Pan with Clad Base (11-inch)
Three-layer construction ensures even heat distribution. Slightly larger cooking surface. More expensive but genuinely superior for meats that need consistent browning. Dishwasher safe.
4. Lightweight Cast Iron Alternative (7-inch)
For smaller households or people cooking for one. Heats faster than larger cast iron. Less intimidating for beginners. Still requires seasoning but uses less oil and storage space.
5. Enameled Cast Iron Grill Pan
Cast iron with a colored enamel coating on the bottom (top remains bare). You get heat retention without seasoning maintenance—the enamel handles that. Trade-off: slightly more expensive, enamel can chip with rough handling.
6. Heavy-Duty Stainless Steel Ridged Skillet (12-inch)
Maximum cooking surface for people meal-prepping or cooking for groups. Thicker gauge stainless steel improves heat distribution. The extra size means more vegetables or multiple small steaks. Best investment if you entertain frequently.
7. Dual-Sided Cast Iron Pan
One side is a regular skillet, one side is ridged for grilling. Space-saving option if your storage is limited. Honestly, I found this less practical than owning two dedicated pans—it’s a compromise that doesn’t excel at either function.
8. Non-Stick Grill Pan (10-inch)
Best if you cook fish regularly or want minimal oil. Modern non-stick that’s lasted me 4+ years without degradation. Ceramic or PTFE, both acceptable. Not ideal for high-heat searing.
9. Stainless Steel Grill Pan with Removable Handle
Mostly for look and storage convenience. Removable handles don’t improve cooking performance. Nice if you have limited cabinet space or want to nest it with other pans.
10. Cast Iron Grill Pan with Smooth Cooking Surface Option
Some high-end cast iron manufacturers offer pans with more subtle ridges for a modern flat-top look while still creating grill marks. It’s a middle-ground aesthetic choice—looks nicer, but the shallower ridges mean slightly less dramatic results.
Side-by-Side Grill Pan Comparison
| Material | Heat Retention | Heats Quickly | Maintenance | Dishwasher Safe | Price Range | Best For |
|---|---|---|---|---|---|---|
| Cast Iron | Excellent | Slow | High (seasoning) | No | $20-50 | Serious searing |
| Stainless Steel | Good | Very Good | Low | Yes | $60-150 | Everyday cooking |
| Non-Stick | Fair | Very Good | Low | Sometimes | $40-100 | Fish & delicate foods |
| Enameled Cast Iron | Excellent | Slow | Medium | No | $80-180 | Set-and-forget heat |
How to Actually Use a Grill Pan (The Method That Works)
I’ve made every beginner mistake possible, so let me save you some frustration.
Preheat properly: Place your pan on medium-high heat for 3-5 minutes. Cast iron takes longer; stainless steel is faster. The pan should be hot enough that a drop of water dances across the surface (it creates a ball and rolls around). That’s your signal it’s ready.
Don’t overcrowd it: This is huge. I used to throw an entire zucchini’s worth of slices on the pan at once. They steamed instead of seared because moisture couldn’t escape. Leave space between pieces—about a quarter-inch gap is perfect.
Oil lightly, not heavily: Use a high-smoke-point oil (avocado, vegetable, or refined coconut oil work). Don’t use olive oil or butter for high-heat grilling—they’ll smoke aggressively. Brush oil directly on the food, not the pan. This prevents pooling in the valleys and reduces splashing. One tablespoon for a whole pan of vegetables is plenty.
Don’t move the food constantly: Let it sit on the ridges for 2-3 minutes before flipping. The grill marks develop from direct contact with the ridges. If you’re constantly shuffling things around, you won’t get that nice caramelization. I learned this by doing the opposite and getting weak grill marks.
One flip, maybe two: Flip once halfway through cooking. Don’t flip it back and forth. Most foods cook perfectly in a two-sided approach: 2-3 minutes per side for vegetables, 3-4 minutes per side for fish, 4-5 minutes per side for chicken (depending on thickness).
Let it rest after cooking: This applies especially to meat. Pull it off the pan and let it sit for a few minutes on a plate. This lets juices redistribute internally instead of running out when you bite into it.
Common Mistakes to Avoid
Using a grill pan on the wrong burner type: Cast iron works on electric, gas, and induction. Stainless steel works on everything. Some non-stick pans aren’t induction-compatible—check before buying if you have an induction cooktop.
Not preheating long enough: Impatient cooking is the number-one reason people complain that grill pans don’t work. “It just steamed my food” usually means the pan wasn’t hot enough. Give it five minutes. Seriously.
Cooking straight from the refrigerator: Cold food hitting a hot pan drops the pan’s temperature significantly. Room-temperature or slightly cool food stays hotter and sears better. I take meat out 10 minutes before cooking; vegetables don’t need to come up to room temperature.
Using soap on cast iron: You can use mild soap and water—that’s not the myth. What you can’t do is soak it, scrub aggressively, or put it in the dishwasher. A quick rinse and wipe while warm is sufficient.
Assuming all grill pans are the same: They absolutely aren’t. A $15 pan from a discount store will have thin walls and uneven ridges. It’ll work, but you’ll notice the limitations. Spending $40-60 on a quality cast iron or stainless steel pan makes a real difference.
Storing it without drying: Moisture is cast iron’s enemy. Dry it immediately after washing—within 30 seconds—or rust will develop. This is the main reason people “ruin” cast iron.
FAQ: Your Grill Pan Questions Answered
Real Talk: What Grill Pan Do I Actually Use?
I own four grill pans: a 10-inch cast iron square, a stainless steel 11-inch with clad base, a 9-inch round non-stick, and an enameled cast iron. I use the cast iron and stainless steel most. The cast iron comes out for weeknight dinners when I have time to preheat properly and want those dramatic sear marks. The stainless steel is my grab-and-go option when I’m cooking for multiple people or when I want to minimize fussing. The non-stick handles Friday nights when we’re grilling fish and I want zero stress. The enameled cast iron is honestly more aesthetic than practical—it looks beautiful on the stove but doesn’t improve cooking.
If you’re starting from zero, buy one quality stainless steel grill pan (around $70-90) and one cast iron (around $40). Those two will handle 95% of your stovetop grilling needs. Later, if you realize you want something specialized, add another.
The best grill pan for stovetop cooking is the one you’ll actually use consistently. A fancy pan sitting in the cabinet helps nobody.
Getting the Most From Your Investment
Here’s something nobody talks about: grill pans have a learning curve. The first time you use one, you’ll probably be underwhelmed. Maybe the marks aren’t as pronounced as you expected or something stuck slightly. That’s normal. Give yourself three to five cooking sessions before deciding whether you like it.
What changes is your intuition. You’ll figure out how long to preheat, how much oil to use, which foods work best, and how to get that sear you’re chasing. By week two, you’ll notice the difference. By week four, you’ll be making steaks and vegetables that look restaurant-quality.
The other thing that helps: patience on the heat. This sounds simple, but too many people cook at medium-high when they should be going higher, or they’re not letting food sit long enough to develop color. A grill pan isn’t like a regular skillet—it rewards patience with that perfect caramelization and those beautiful marks.
The Bottom Line on Best Grill Pans for Stovetop Cooking
The 10 best grill pans for stovetop cooking cover a range of needs and budgets, from budget-friendly cast iron to specialty enameled options. There’s no single “best”—it depends on how you cook, how much maintenance you want, and whether you prioritize performance or convenience. But any quality pan in any of these categories will transform your stovetop cooking dramatically. You’ll stop looking at outdoor grilling with envy because you’ll realize what you can create right there on your stove.
Start somewhere. Buy one good pan. Preheat it properly. Give it time. In a month, you’ll understand why people get obsessed with grill pans.